Information on how NUpbr works can be found on the NUpbr system page. This guide has been written for Ubuntu and Ubuntu-like systems.
Setting Up Blender
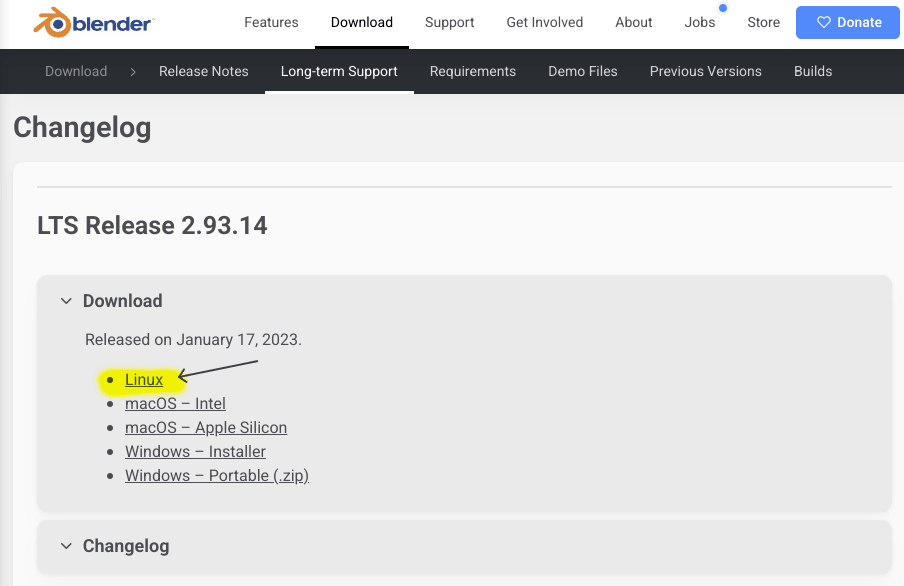
Download Blender 2.93. Click on the Linux link, as shown below.
![Blender download link]()
The Blender 2.93 download page highlighting the Linux option. Create a Blender folder and extract the tar file into it. This assumes the tar you downloaded is inside the
Downloadsfolder.sudo mkdir /opt/blendersudo tar -Jxf ~/Downloads/blender-2.93.13-linux-x64.tar.xz --strip-components=1 -C /opt/blenderMake sure you can see the Blender files inside the folder by running
ls /opt/blenderin a terminal.Test that you can run Blender by running
/opt/blender/blenderin a terminal.Set up your computer so you can access Blender from the menu and with the
blendercommand. If you have multiple versions of Blender installed, you may want to skip this step and only open Blender for NUpbr using/opt/blender/blender.Open the config file
sudo gedit /opt/blender/blender.desktopFind the lines starting with
ExecandIconand change those lines toExec=/opt/blender/blender %fIcon=/opt/blender/blender.svgTo be able to run Blender using just
blender, runecho alias blender=/opt/blender/blender >> ~/.bashrc
Install libraries for Blender
sudo /opt/blender/2.93/python/bin/python3.9 -m ensurepipsudo /opt/blender/2.93/python/bin/python3.9 -m pip install --upgrade pipsudo /opt/blender/2.93/python/bin/python3.9 -m pip install opencv-contrib-python
GPU Support (Optional)
Running NUpbr with a GPU is generally quicker than with a CPU. You can skip this step if you want to run on CPU.
To run on GPU, you need to ensure that your computer has the correct GPU drivers installed. This depends on your manufacturer. On an NVIDIA GPU, nvidia-smi will tell you the driver you are using. It can also be used to check if Blender is using the GPU.
If Blender is not using the GPU, then you may need to edit your Blender settings. Open Blender and go to Edit > Preferences > System. Under Compute Device, select CUDA. If you have multiple GPUs, you can select which one to use here.
Setting Up NUpbr
Clone the repository and navigate into the folder
git clone https://github.com/NUbots/NUpbr.gitcd NUpbrDownload the resources.zip file from the NUbots NAS and copy the resources directory from it into the NUpbr root directory. A more comprehensive resources folder can be found on the NAS.
To access the download, you need to be in the NUbots lab and connected to the local network. QNAP cloud can be used to connect to the NAS remotely.
Set up the configuration. This often just involves setting the number of images to generate in output_config.py.
Run NUpbr using
blender --python pbr/pbr.pyNUpbr can also be run in headless mode with
blender -b --python pbr/pbr.py


